
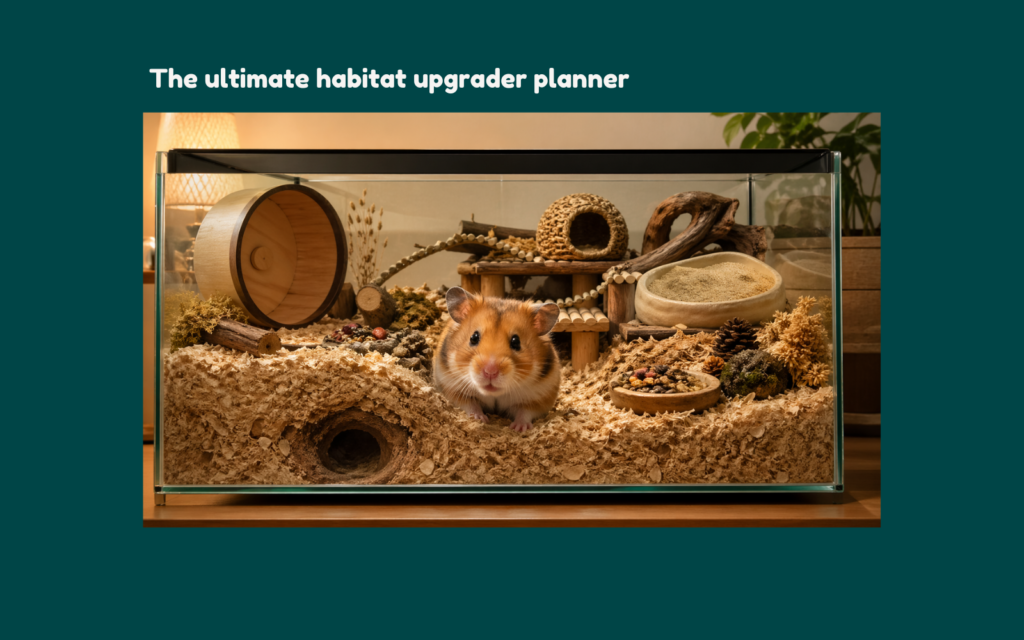
How to Use the Ultimate Habitat Upgrader Planner to Create a Welfare-Compliant Enclosure
Disclaimer: This guide provides general educational information regarding enclosure setups and animal welfare standards. It is not a substitute for professional veterinary advice. Always consult with a certified exotic veterinarian for specific health or behavioral concerns.
To successfully transition a hamster into a permanent, high-enrichment home, owners must use the Ultimate Habitat Upgrader Planner to create a welfare-compliant enclosure that supports their natural instincts.
Moving a hamster into a new cage can quickly become a stressful, chaotic project if poorly planned. We know how overwhelming it feels to balance sudden purchases, shifting timelines, and the wellbeing of a delicate pet. This validates the absolute need for a clear, organized blueprint. Trying to execute this transition without a plan is exactly like trying to build a house without a blueprint—materials pile up, mistakes happen, and the foundation ultimately fails.
This guide provides a step-by-step roadmap to upgrading your pet’s home, covering how to safely audit equipment, manage the physical build, and execute a stress-free move. Utilizing the Ultimate Habitat Upgrader Planner ensures you maintain focus and budget throughout the process. Ultimately, a carefully executed habitat planner creates a completely welfare-compliant enclosure.
Understand why a structured Ultimate Habitat Upgrader Planner is essential for long-term health
A structured Ultimate Habitat Upgrader Planner is essential for long-term health because a high-enrichment enclosure is the absolute cornerstone of your hamster’s physical and mental wellbeing.
- Rule: A successful transition must move a hamster from a basic enclosure into a permanent habitat that exceeds minimum welfare standards.
- Reason: Hamsters require specific environmental infrastructure to display natural behaviors; depriving them of space causes unnecessary physical and mental distress.
- Example: Contrast the limitations of a small cage, where a hamster will often exhibit stress-induced bar-biting, with a spacious, high-enrichment home featuring deep substrate that encourages natural burrowing.
Define the core phases of a successful Ultimate Habitat Upgrader Planner
A successful Ultimate Habitat Upgrader Planner follows a clear roadmap designed to seamlessly guide you from your initial blueprint to the final post-move analysis.
- Discovery and Blueprint: Measure your home’s available footprint and audit your existing enrichment.
- Asset Acquisition: Source your enclosure, ample compressed substrate, and essential health textures.
- Safety and QA: Sanitize all wooden items and perform a leak test to ensure the enclosure is escape-proof and well-ventilated.
- Deployment: Build the bedding layers securely and execute the transition during low-activity hours.
- Post-Mortem Analysis: Evaluate the move seven days later to close the continuous improvement loop.
Establish the non-negotiable rules before starting your Ultimate Habitat Upgrader Planner
Before you purchase any new equipment, you must establish clear welfare parameters during your Ultimate Habitat Upgrader Planner to ensure a safe transition.
The Welfare-Compliant Setup Checklist
0/3- Vital Equipment: Secure an upright, solid-surface wheel properly sized for your specific species to ensure a neutral running posture and protect their back.
- Safety Audit: Sanitize all wooden items thoroughly to remove bacteria, and freeze new substrate before use to mitigate risks.
- The Scent-Link Protocol: Save the old nest and mix some of the old bedding into the new habitat to act as the primary olfactory anchor, drastically reducing stress during the move.
Choose an immediate next step to execute your Ultimate Habitat Upgrader Planner
To prevent project delays, choose an immediate next step to execute your Ultimate Habitat Upgrader Planner and officially launch your enclosure upgrade.
Variable A
A basic cage (which limits natural behavior and suppresses enrichment).
Scientific limitation: Shallow pans critically suppress burrowing instincts, while inadequate wheel diameters cause dangerous spinal curvature.
Variable B
A high-enrichment habitat, such as a furniture conversion (which provides ample space and proper depth for a fraction of the cost of a specialty tank).
Scientific advantage: Unbroken spatial footprint and deep substrate facilitate proper neurological stimulation and physical security.
- Rule: The project must have a “Go-Live” deadline and a defined resource budget to prevent delays.
- Immediate Action: Measure the designated footprint in your home tonight and budget for plenty of substrate, purchasing extra to prevent a shallow fill.
Track project phases to monitor the success of your Ultimate Habitat Upgrader Planner
You must track project phases to monitor the success of your Ultimate Habitat Upgrader Planner and keep your physical build organized and on schedule.
| Phase | Actionable Task Checklist (P3) | Owner | Status |
|---|---|---|---|
| Phase 1: Blueprint | Measure footprint & audit items | ||
| Phase 2: Asset Acquisition | Source primary substrate | ||
| Phase 3: Safety & QA | Sanitize items & leak test | ||
| Phase 4: Deployment | Build layers & transition | ||
| Phase 5: Analyze | Evaluate move after 7 days |
Execution Note: Briefly remind the reader that mixing soft orchard or Timothy hay into the substrate acts as a critical “glue” to hold tunnels intact during deployment.
Analyze move results to personalize your Ultimate Habitat Upgrader Planner
You can evaluate the true success of your project by analyzing the move results to personalize your Ultimate Habitat Upgrader Planner.
- If: The hamster is observed displaying natural excavation patterns and foraging behaviors for seven consecutive days.
- Do: Complete the post-mortem analysis to document what went well and what should change next time, ensuring you avoid loose, collapsing substrates.
- Result: Achieve a successful transition where the pet thrives in a permanent, high-enrichment home free of obsessive behaviors.
Resolve setup errors to refine your Ultimate Habitat Upgrader Planner
You can refine your Ultimate Habitat Upgrader Planner by utilizing a simple review process to resolve and learn from early setup errors.
The Post-Mortem Analysis Template
-
Step 1: Document what went well, such as an escape-proof DIY lid and properly managed ventilation.
-
Step 2: Identify what went wrong, such as heavy ceramic items sinking into the deep bedding.
-
Step 3: Commit to specific changes, such as building wooden stilts or platforms to support heavy sand baths so they cannot shift and harm a burrowing hamster.
Resolve common questions about enclosure safety during your Ultimate Habitat Upgrader Planner (FAQ)
To ensure your new habitat is entirely secure, it is important to resolve common questions about enclosure safety during your Ultimate Habitat Upgrader Planner.
Question: How do I ensure my wooden items and substrate are completely safe?
Direct Answer: Sanitizing wood items and freezing substrate helps eliminate potential risks.
Strict Rule: You must strictly avoid using “fluffy” cotton or kapok bedding, which poses a serious digestive hazard, and ensure all running wheels have a completely solid surface to keep their delicate paws safe and comfortable.
Verified Veterinary & Welfare Citations
- Merck Veterinary Manual: Validates the strict safety rule against fluffy cotton bedding (digestive and entanglement hazards) and mandates solid-surface wheels.
- RSPCA UK: Establishes the absolute necessity of continuous, unbroken floor space and deep substrate for natural behavioral expression.
- Animal Humane Society: Confirms physiological requirements for deep burrowing, appropriate wheel sizes, and multi-chamber hides.
Finalize your Ultimate Habitat Upgrader Planner and start your enclosure transition tonight
You can finalize your Ultimate Habitat Upgrader Planner and start your enclosure transition tonight by measuring your space and defining your project boundaries.
- Measure your home’s designated footprint today to define the boundaries of the new habitat and ensure it provides ample space.
- Set a hard “Go-Live” date and budget to transform your project into a scheduled reality, including extra substrate.
- Audit your existing enrichment items to identify which safety-checked assets can move into the new build.
Use these finalized action steps to begin the transition toward a high-enrichment enclosure.
Providing a habitat that exceeds minimum welfare standards is the most impactful step you can take to ensure your hamster lives a comfortable, enriched life.